Positioning the Hips for Mobility
Rifton Pacer Gait Trainer Video 4
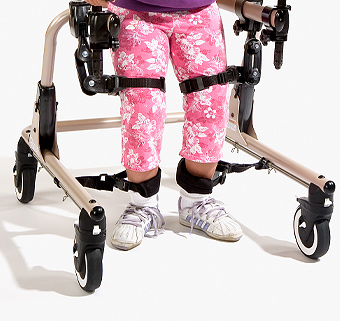
The hip positioner—also known in the field as a 'saddle'—is a crucial component in partial weight bearing gait training, and an option most other pediatric or adult support walkers do not have. Supporting and positioning the pelvis either anteriorly or posteriorly can make a significant difference in a client's ambulatory gains. It is important to understand the hip positioner's correct use, as detailed in this video. A transcript is provided below for viewers with hearing disabilities.
Watch more videos in this series:
Rifton Pacer gait trainer video 1 | The Frame
Rifton Pacer gait trainer video 2 | The Chest Prompt
Rifton Pacer gait trainer video 3 | The Arm Prompts
Rifton Pacer gait trainer video 4 | The Hip Positioner
Rifton Pacer gait trainer video 5 | The Thigh Prompts
Rifton Pacer gait trainer video 6 | The Ankle Prompts
Sean Carter's Journey through TBI rehabilitation, Part I
Sean Carter's Journey through TBI rehabilitation, Part II
Transcript
[00:00:00] Caption: Hip Positioner
[00:00:00.10] Narrator: The hip positioner is designed to help the user gain the best possible position for gait training. The placement and length of the straps is key. To install the hip positioner, first place the handholds toward the back of the top bar. Like the chest and arm prompts, you can adjust the height with the push of a button. With these clips, attach the front two straps. This is a good place to attach it when the user is in an upright position. You may also attach it to the arm prompts.
[00:00:46.04] Narrator: Because the hip prompt positions the pelvis, the straps should be the correct length. Think of it as a bicycle seat. It should be level, or angled upward slightly so that weight-bearing occurs comfortably. This pad can be attached on the hip positioner for more user comfort. When the user is forward-leaning, the anterior straps can be placed in front of the main frame uprights, or on the chest prompt posts for a more posterior placement of the pelvis. When the user is in extreme forward leaning, the anterior straps can be placed here, or on the chest prompt bar. When using the hand-holds, the back straps clip on here. For safety, the back straps only come off when the rings are vertical.
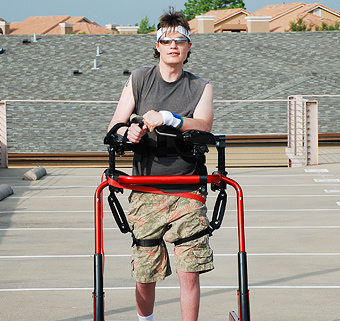
[00:01:45.10] William Lynch, Physical Therapy Director: When we were first positioning him, he wouldn't move. I was watching him from a distance and I was able to just change the hip positioner and actually raise him up a little bit more so he had enough toe clearance, and then he took off.
[00:02:01.17] William Lynch, Physical Therapy Director: What are you doing, Mario, are you flying?
[00:02:03.27] Mario: No, walking.
[00:02:04.24] William Lynch, Physical Therapy Director: You're walking? Let me see you walk faster. Go, go, go!
[00:02:09.17] Mario: Go get Pat. Go get Pat. Go get Pat. Go get Pat.
[00:02:12.16] Narrator: For a user who requires very little support and is positioned posteriorly, the hand-holds can be taken off and the straps clipped onto the top bar.
